Baking Parchment Paper for Image Transfer and more
By BagCraft
$6.25
- UPC:
- 787074001040
- Bulk Pricing:
- Buy in bulk and save
- Buy 2 or above and get $0.25 off
Bulk discount rates
Below are the available bulk discount rates for each individual item when you purchase a certain amount
As a baking surface this paper works great! Cut sheets into small pieces, ready to grab and work!
25 sheets 8” x 11”
As Transfer Paper
This is a wonderful product to use with a Laser Printer. This paper has been tested on a Samsung Laser Printer and a Konica Minolta Laser Printer. I feel pretty certain that it would work with any laser printed image but I can't guarantee it.
NOTE: The brand I am selling did not work in my Epson Ink Jet Printer. The ink puddled up or with a different setting, soaked into the paper and did not transfer at all. I don't know how it works with other brands of ink and printers or different printer settings.
Please read everything on this page before purchasing.
The demonstration video uses the following equipment and supplies:
Samsung CLP-315 Laser Printer
Baking Parchment Paper Sold Here
Free Image from DoverPublications.com
Sculpey Premo! White Polymer Clay
Technique:
Design the image using your favorite computer program.
Your image needs to be reversed, especially if it has text.
If you don't reverse your image, the text will read backwards.
Print the image on a laser printer. I used a Samsung CLP-315.
The printer setting I used first was Thin Paper (under the Paper Tab)
and Best Quality (under the Graphic Tab).
It printed fine the first time and then would not print again. It kept
jamming the printer. After much trial and error I came up with a
way to feed the paper without having to tape it to another sheet.
Instead I folded over about 3/8" of the top of a plain sheet of paper.
I creased the fold using my finger nail to get a very sharp crease.
I slipped the parchment paper under the fold and loaded it in the paper tray.
I used the printer setting for Thick Paper (under the Paper Tab) and
kept the Best Quality set (under the Graphic Tab).
This tricked the printer into thinking it was a heavy piece of paper.
Note: Be careful you design your image low enough on the page
to miss the 3/8" top of the folded paper.
Cut out your printed design (being careful not to touch the image if it is freshly printed). Leave a border of blank paper around the image.
Run white polymer clay through your pasta machine at the thickness you want your piece to be. I used setting #2 (PM2), the second from largest thickness. You need a sheet large enough for your design.
Lay your sheet on your baking surface. If you don't, when you move the piece you risk cracking or distorting the transferred image.
Lay your printed image on the clay with the "ink" side down (toner actually).
Burnish (rub) the image all over using slight pressure. Don't press so hard that you distort the clay underneath.
When you have rubbed the entire surface of your design very well, lift a corner of the paper. If the paper is not stuck to the clay, burnish it longer.
Grab the corner of your paper and RIP it off in one quick motion.
The "ink" stays behind, on the surface of the clay.
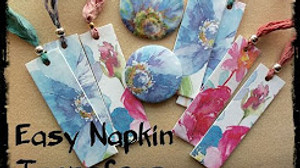
Trim your clay around the image as desired and bake, following the clay package directions. When it has cooled, you can varnish if you want.


